Visualization and post-processing#
HemoCell can create different types of output files depending on the used
configuration files and the provided
output settings, specifically <sim><tmeas> and <sim><tcsv> (see also
Saving only the CSV output).
By default HemoCell writes the fluid and cell fields to .h5 files in a
hdf5 directory in the output. These can be converted for visualization in
Paraview using scripts/batchPostProcess.sh.
Paraview#
After generating the *.xmf using batchPostProcess.sh these files
can be loaded in Paraview for visualization. On opening, please select the
Legacy XDMF reader to import the files, as the current *.xmf files are
not yet XDMF3 compatible.
Paraview provides a large set of tools for the post-processing, visualization, and investigation of the generated output files. All different fields, e.g. fluid, RBC, PLT, etc., can be shown independently with great range of detail.
Blender#
Advanced rendering of HemoCell’s output can be created with Blender. This typically focusses more on creating nice looking renderings, visualization, and animations, wheres Paraview aims more at scientific visualization and data interpretation.
Blender renders can be generated using
convert_xmf_to_x3d.py. This script helps to convert
the generated *.xmf particle files from batchPostProcess.sh to
the X3D file format. After running the script a x3d directory is created and
populated with the *.x3d files. These can directly be imported in Blender
(and many other computer graphics tools) for further rendering.
After importing, Blender provides a large range of tools to generate renderings. For a novice user, we suggest to follow some basic Blender tutorials to get started with these rendering techniques. The typical workflow is to generate a desired layout and scene (lights, cameras, material properties, etc.) using the graphical interface by Blender before rendering the images.
Alternatively, the process can be automated and scripted using Python as shown
in the example script hemocell/scripts/visualization/render_oneCellShear.py
that generates a rendering corresponding to the One shearing cell example.
The full post-processing pipeline will look as follows
# from /hemocell/examples/oneCellShear
mpirun -n 1 oneCellshear config.xml

# generate tmp/*.xmf files
../../batchPostProcess.sh

# convert tmp/*.xmf to tmp/x3d/*.x3d scenes
cd ../scripts/visualization
./convert_xmf_to_x3d.py ../../examples/oneCellShear/tmp

# render image(s) with Blender
blender -b -P render_oneCellShear.py
Afterwards, the resulting PNG renders are place in examples/tmp/renders/.
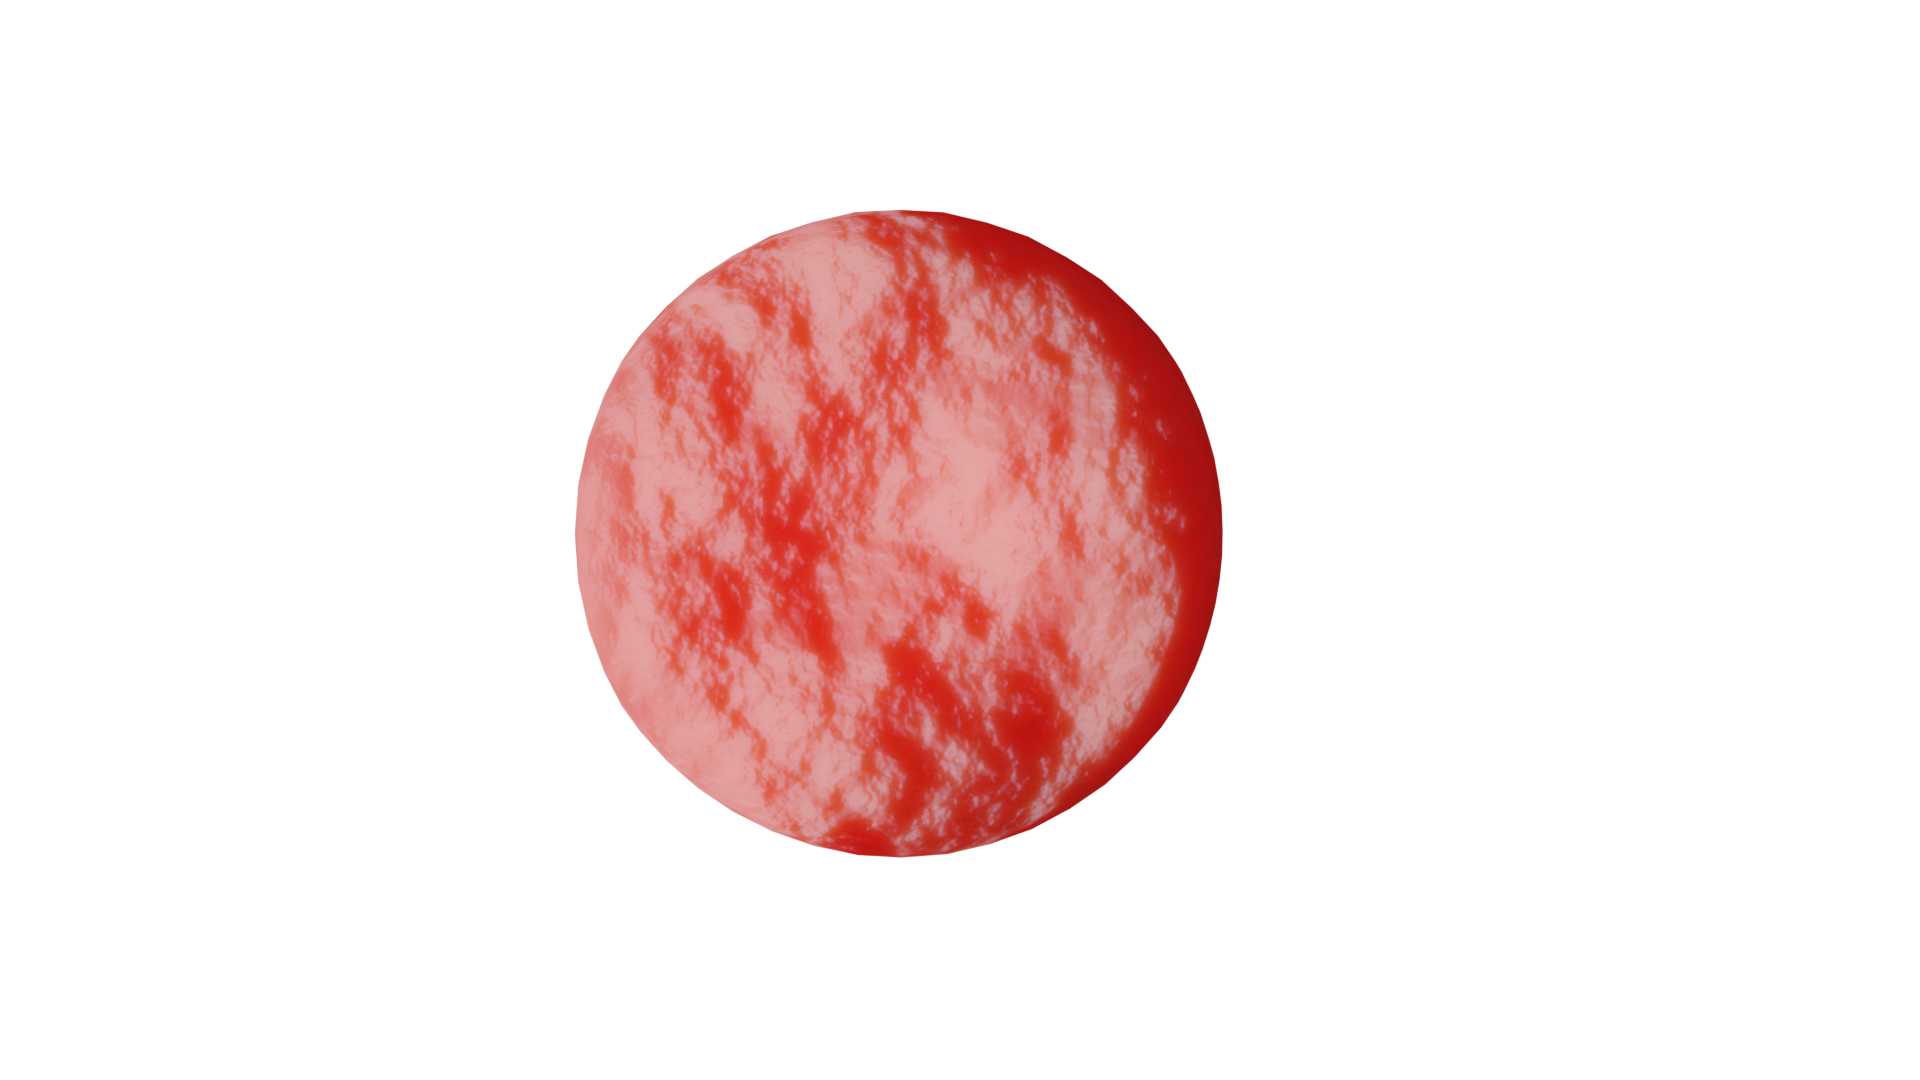
An example rendering of a single red blood cell as generated from the
oneCellShear example.#
pos_to_vtk#
The pos_to_vtk provides basic visualisation of initial *.pos cell packings/positions
files, as described in its documentation under Viewing of cell packings.